Growing Tomatoes In Buckets Is Fun And Healthy
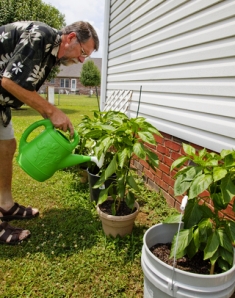
Is growing tomatoes in buckets right for you? Maybe so if you would like to grow a garden, but just don’t have the space. Perhaps you live in an apartment, a townhouse, or just don’t have a suitable place in your yard. Just imagine picking ripe and delicious organic tomatoes from your porch or patio and enjoying them on salads or hamburgers? Tomatoes are not hard to grow in a large pot, and just one or two plants can keep you supplied with tomatoes all summer long.
Sun, Water, Organically Fertilized Soil
Just find a spot for growing tomatoes in buckets with 6 to 8 hours or more of unshaded direct sunlight a day, and a place that is sheltered from strong wind gusts. Although tomatoes love heat, you don’t want a location that is over 100 degrees Fahrenheit, or your tomatoes might not fruit as well. If you live in a hot climate, consider a spot where they have partial shade during the hottest hours of the day. Perhaps there is suitable space in your yard or along the sun side of your house, or on a balcony or window sill. Maybe a doorstep, patio, or even a hanging basket. You have just found the space for your own mini-garden!
Choose The Bucket
Almost any type of canister can be considered for growing tomatoes in buckets, including wooden boxes, bushel baskets, plastic or fiberglass buckets or drums. A 5 gallon bucket, wooden or plastic, is usually about right for most varieties of tomatoes. For cherry or dwarf tomatoes, a 2 gallon container or even a hanging basket or window box works well, since the fruit is small enough not to break the branches, as opposed to large tomatoes, which need some support for the branches.
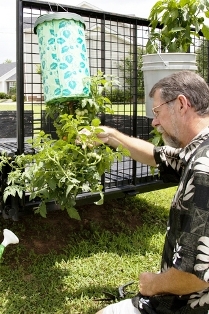
Using a larger container to put your potting soil and organic fertilizer in is necessary as tomatoes have a large root structure, which can go down 5’ or more. They require more root space than most other vegetables. If you use a container that is solid based, it must have adequate drainage to avoid the plant sitting in soggy soil all the time and rotting. If no drainage holes are present, drill four or five ¼” drain holes on the sides about one-half inch from the bottom. One inch of course gravel or rock in the bottom of the container will help to keep the holes draining.
If you are growing tomatoes in buckets that have been used for other plants, make sure and scrub them well to remove any possible soil-born diseases. We prefer plastic over clay containers, since plastic is less expensive, doesn’t break as readily as clay, and the soil will not dry out as rapidly.
Choose A Tomato Variety
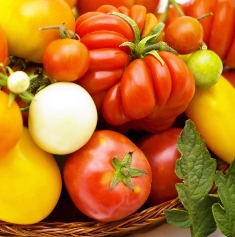
Most varieties of tomatoes are suitable for growing in a bucket. Begin by choosing where you will get your seedlings. You may buy your tomato seedling transplants from a nursery or gardening center, or you can grow them yourself. You need to watch for two things when choosing which variety to use.
1. Match the tomato variety with your climate. Most varieties require nights of at least 55 degrees F. If you are growing tomatoes in buckets and if you live in a cooler climate, you will need to choose a cool weather variety.
2. Look for an indeterminate variety of tomato. A determinate bushy variety of tomato only grows to a certain size, then stops, and only bears for a few weeks. An indeterminate variety of tomato grows slower, but can bear for months. If you choose an indeterminate variety, be ready to use a cage or trellis to support the vine and the ripening fruit.
Provide Nutrient Dense Soil
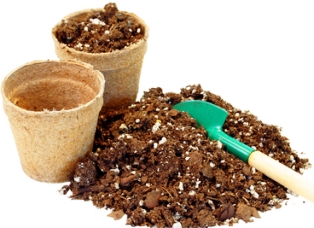
For your soil, choose a good quality organic potting soil. You want a loose soil with a good amount of organic matter. Don’t just dig up soil from a garden, since it is generally too compact for a container garden, will not drain properly, and may be infested with soil pests.
If you are growing tomatoes in buckets, the plants need a good supply of phosphorus, magnesium, and calcium. You can mix nutrients into your potting soil to help supply this, such as aged manure and peat moss, or your own special compost mix.
Dilute a teaspoon of organic fertilizer into water, and add to the soil. These items will provide a steady supply of nutrition throughout the year. You can add straw or dried grass clippings to supply organic matter to enhance the soil. This will help to hold moisture, and add nutrients as it breaks down. Another good mixture is 1 part potting soil, 1 part perlite, 1 part sphagnum peat moss, and 1 part homemade compost.
Plant Your Tomato Seedlings
Now that you have your soil ready, we are ready to plant. As mentioned before, start with 1” of gravel or rocks in the bottom of the container. Place in your preformed stake, trellis, or homemade cage that fits the container for the tomato vine to climb on. This will keep the vine off of the ground and protect branches from breaking under the weight of ripening fruit. Then add in your soil mix containing the organic fertilizer.
Next, bury a tomato plant seedling so that the soil comes up just below the first set of leaves. This will help the plant develop a strong root structure that potted plants need, since new roots will shoot out from the stem that has been buried. Plant the seedling close to your stake, cage or trellis. When done, you want the soil within about an inch of the rim of your bucket, to allow for watering. Now go ahead and give it a good watering. If the soil settles, add more soil to bring it up to 1” below the rim. You might want to add a mulch, such as pebbles, shredded bark, grass clippings, or straw, to help the soil to retain moisture. Growing tomatoes in buckets is not as difficult as anticipated.
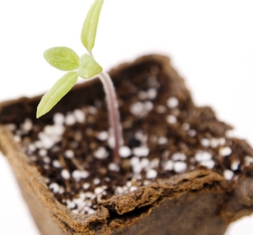
Growing your own seedling transplants
For most people, it is just easier to get it right by buying seedlings from a nursery or garden center than to grow them. However, if you want to germinate your own seeds, you can use a cardboard milk carton, a pot or a baking pan.
Six to eight weeks before you want to transplant them, fill your chosen bucket with your soil mix, add your seeds, then cover with a quarter to half inch of soil mix. Place the container in a warm area that receives good sunlight. When the tomato seedlings have 2 or 3 true leaves, you can transplant them into your waiting container, being careful not to injure the root system. organic fertilizer with a low sodium sea mineral concentrate per gallon of tea. The sea mineral concentrate gives your tomato plants the full spectrum of nutrients from the ocean, improving taste, shelf life and insect resistance. Put your tea mixture into a spray bottle and wet the leaves, then wet the surface of the soil.
If you don’t have a tea available to you, you may use 15-30-15 Miracle Gro®, or Peters® 20-20-20. Always follow the directions on the label. In general, add one teaspoon of the fertilizer and one teaspoon of sea mineral concentrate to a gallon of water. Shake well, then put in your spray bottle, wet the leaves, and wet the surface of the soil.
In addition to foliar applications, when growing tomatoes in buckets, every 2 to 4 weeks you can apply fish emulsion or seaweed extract (or a slow-release fertilizer) to the soil to keep your plants thriving and to keep the tomatoes coming.
Watering And Care
Generally, when growing tomatoes in buckets, the plants need one to two inches of water per week. A good way to tell if your tomatoes need water is to stick your finger into the soil. If the top 2” are dry, it is time to water. Never let your tomatoes completely dry out. As your tomatoes ripen, water less, so that they don’t taste too watery.
If the soil is too heavy and you don’t get good drainage, your soil may become water-logged. When this happens, water displaces air in the soil, and your plants suffocate. Also, when you water, don’t water the leaves, just the soil. This will make for a healthier plant, and allow your foliar applications of fertilizer to be more effective.
Avoiding Insect Damage And Disease
When you meet the nutritional needs of your tomato plants, especially the full spectrum of nutrients supplied by a good organic fertilizer , pests and disease become much less of a problem. However, check for foliage and fruit-feeding insects every time you fertilize. If you see any, pest eaters like lady bugs or green lacewings can be placed on the plant, or you may use a natural plant derived insecticide like neem oil to kill the pests. If you find a caterpillar, crush it so it won’t return, then look to make sure there aren’t any more. Growing tomatoes in buckets doesn't eliminate insects but can greatly reduce their numbers.
Harvesting
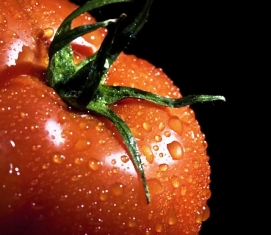
When tomatoes are fully ripe, pick them, as vine-ripened tomatoes are at their peak of flavor.
This will help to induce continued fruit formation. By growing tomatoes in buckets, you can enjoy their delicious taste all summer long.
Growing Tomatoes In Buckets - Problems
Plants are tall, spindly and don’t produce many tomatoes.
Too little sunlight.
Plants are yellow from the bottom and lack good color.
Too much water, too little nutrition.
Plants wilt even though there is enough water.
Poor drainage resulting in drowning of the roots.
Leaf edges are browning.
Organic foliar fertilizer is too concentrated.
Plants grow too slowly, look sick and have a purplish color.
Temperatures are too cool.
Leaves have holes, or are distorted.
A sign of Insect damage.
Leaves are spotted, have dead areas, or have powdery or rusty areas.
A sign of a plant disease.
Top - Growing Tomatoes In Buckets
Eagle Home > How Do Plants Grow > Growing Tomatoes In BucketsProducts We Use and Trust


